Inventobox Overview V1.0 1-11-10
Ever want to build your own pedal, but weren't interested in the soldering, drilling, painting, and all of the assembly needed to make one from scratch?
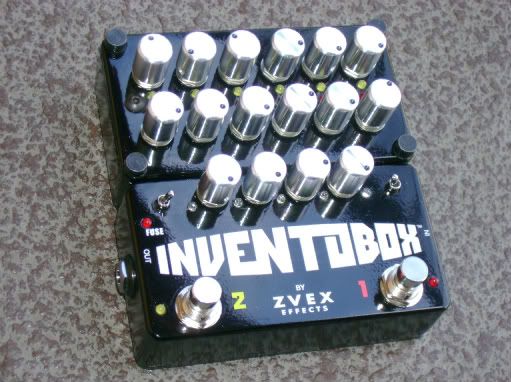
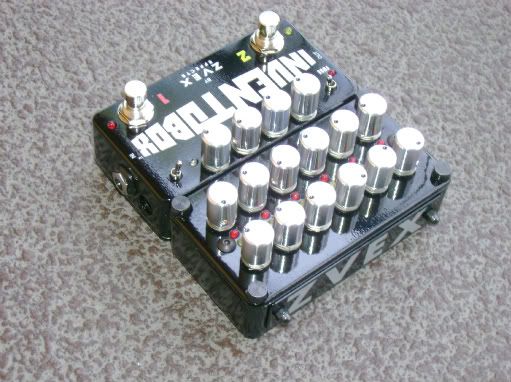
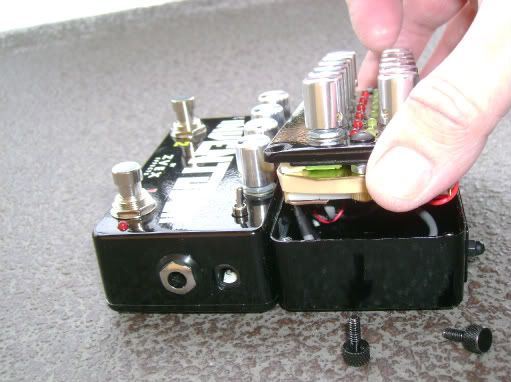
The Z.Vex Effects Inventobox is a unique new product which allows you to quickly design, build and/or modify your own pedals without soldering! The Inventobox comes with two different channels so you can build either one or two different devices into the same box. All of the necessary components are included to make it easy for you... there's a variety of potentiometer values and switches all ready inside the box, quickly accessible through tiny sockets which accept standard experimenter socket wires or included cables. The unit is easily opened by hand to make fast modifications to the circuitry.
The unit consists of four basic components:
1] The enclosure with 4 permanently-mounted 100k potentiometers (rotary controls), two 3-position switches, 5 multi-colored LEDs, and two stomp switches with on/off LEDs.
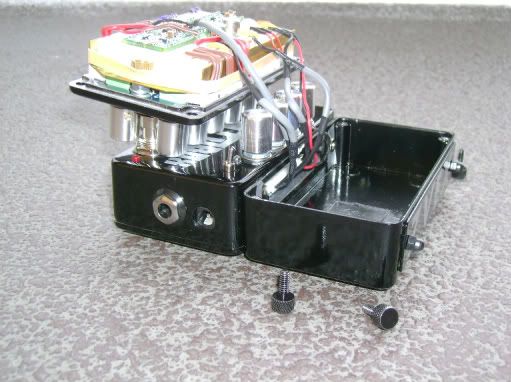
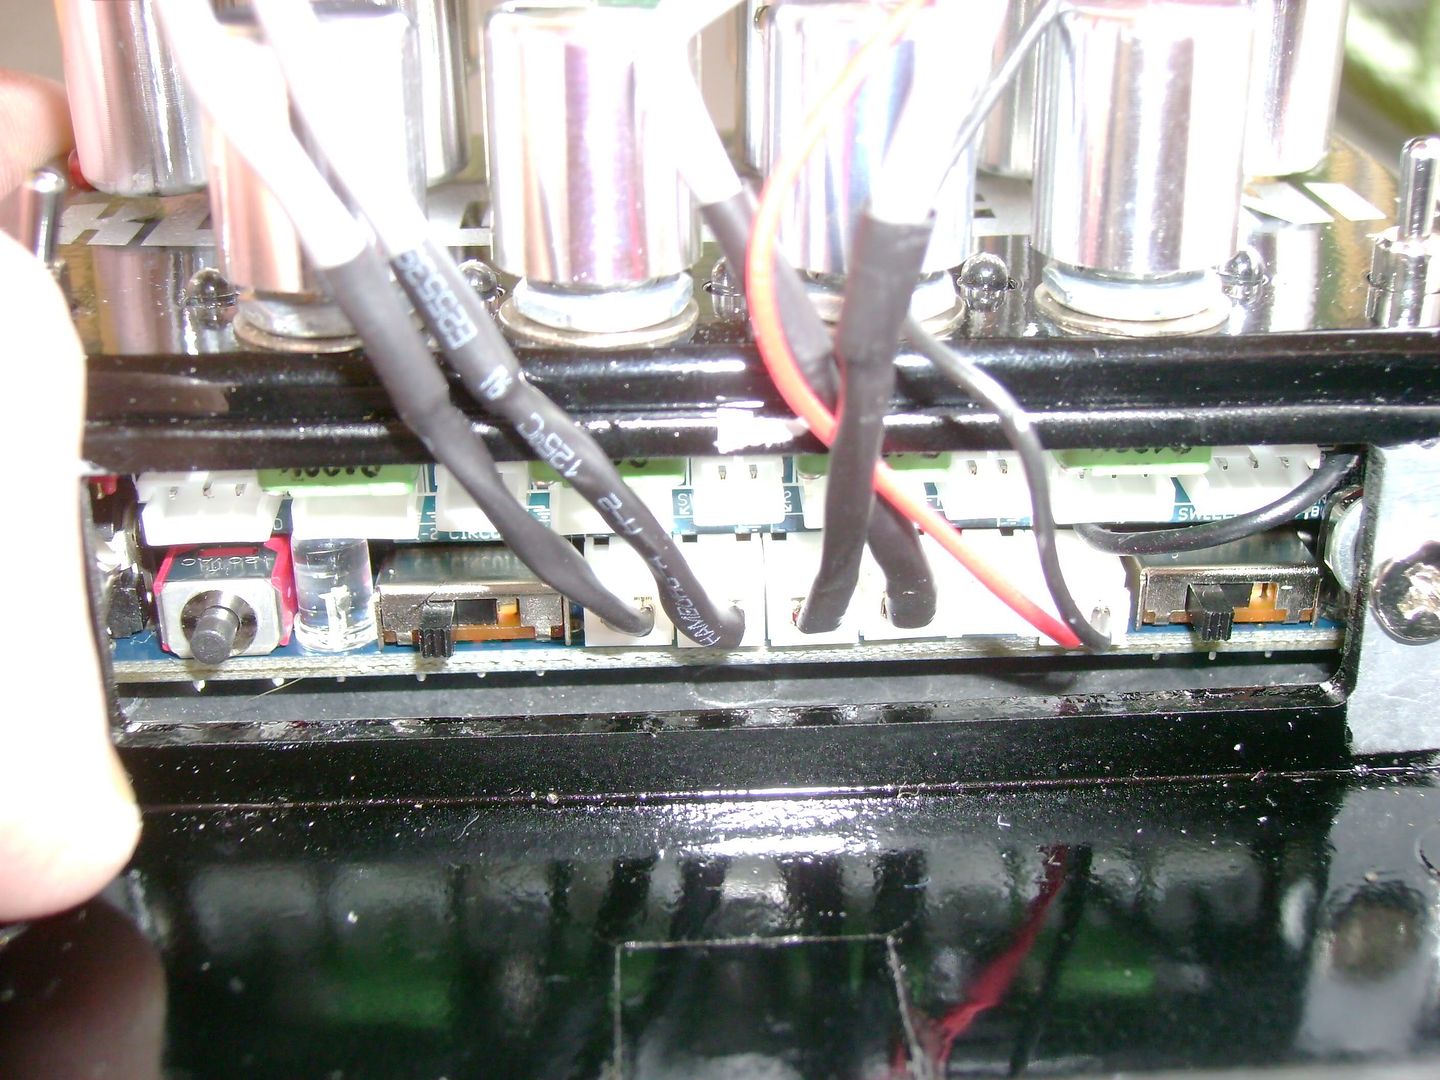
2] Inside the dual enclosure is a window which contains connectors to access the input and output for channels 1 and 2, an LED work light to see the connectors more clearly, a 9VDC power connection, and various connectors for the multi-colored LEDs and potentiometers.
3] The lid for the upper part of the enclosure which contains 12 removable potentiometers (the order and values can easily be changed), 12 LEDs, and sockets which let you easily hook up wires from your pedal circuit to the various controls and LEDs.
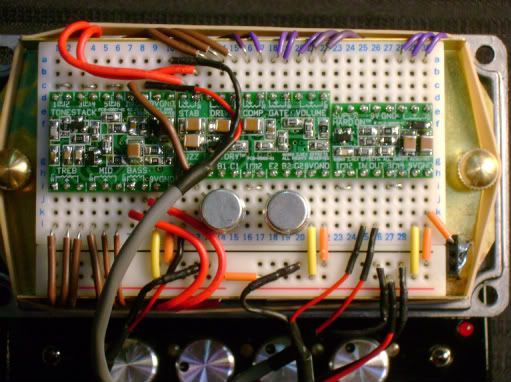
4] The lid also has a removable brass shielded tray which contains an experimenter's socket where you build up your circuits.
Design features:
The Inventobox has several unique design features (patents pending) which make it easy to use as well as road-worthy when assembled. The brass tray provides electrostatic shielding between the bottom of the experimenter's socket and the potentiometers, eliminating cross-talk and noise issues. The removable brass tray on the upper enclosure's lid allows access to 12 removable potentiometers so you can easily set up the correct order for your pots, making the controls easy to remember. The design of the tray allows you to put a securing rubber band around the tray's edge to keep all potentiometer and LED wires in place. This makes the unit road-worthy. The security of the components and wiring is further enhanced by the use of one or more foam inserts which rest against the inside of the upper enclosure, holding vital components in place on the experimenter's socket. The lid locks in place on the two stomp switches for easy assembly when hooking up the cables to wire your circuit into the box. Just set the lid upside down on top of the stomp switches to lock it in place. Also, there are two stainless rods that hold the lid above the upper enclosure if you need to have it closer for easier wiring. Just slip the rods into the threaded screw holes in the enclosure, then hook the bent ends onto the lid.
Other design features include labels on the brass tray and potentiometers that describe connections and values, and a specially-designed circuit board that holds the pots in alignment when changing the order for your designs.
There are a number of different cables included with the Inventobox which provide a complete set of every type of wiring configuration you might need to connect your experimenter's socket to the inside of the lower enclosure. They come in two lengths, 100mm and 150mm, making it easy to reach the experimenter's socket on either the top or bottom. Here is a list of the types, along with descriptions of how they might be used:
A1 = 150 mm, 3 pos shielded wire, Red CCW, Clear middle, GND CW, qty = 1
A2 = 100 mm version of "A1", qty = 1
Used when the CW lug on the potentiometer needs to be shielded. Also use for 3-position switches.
B1 = 150 mm, 3 pos shielded wire, GND CCW, Clear middle, Red CW, qty =2
B2 = 100 mm version of "B1", qty = 2
Use for 100k potentiometers in the lower enclosure that need the CCW lug grounded (such as volume controls). Also use for 3-position switches.
C = 150 mm, 3 pos shielded wire, Red CCW, Clear middle, other side floating, qty = 1
Use for potentiometers or switches which only need two lugs, CCW and middle. Ground the shield at the experimenter's socket to eliminate noise. Also use for switches.
D = 150 mm, 3 pos shielded wire, Red CW, Clear middle, other side floating, qty = 1
Use for speed control potentiometers (tremolos, for example) and ground shield at experimenter's socket to eliminate noise. Also use for 3-position switches which only need 2 usable positions.
E1 = 150 mm, 2 pos shielded wire, qty = 2
E2 = 100 mm, 2 pos shielded wire, qty = 4
This two-pin plug connector is for LEDs or input/output for channels 1 and 2.
F = 150 mm, 3 pos unshielded, GND CCW, clear middle, Red CW, qty = 4
Use for potentiometers or 3-position switches that need no shielding, especially when you have a crowded experimenter's socket and space is at a premium inside your enclosure. The thin wires make it a lot easier to pack things inside the upper enclosure.
G = 150 mm, 2 pos unshielded wire qty = 4
Use for input/output wiring for channels 1 and/or 2 when shielding is not necessary, or for LEDs which don't need noise shielding.
H = 100 mm, 3 pos unshielded, GND CCW, clear middle, Red CW, qty = 4
Use for potentiometers or 3-position switches that need no shielding, especially when you have a crowded experimenter's socket and space is at a premium inside your enclosure. The thin wires make it a lot easier to pack things inside the upper enclosure. Similar to type F but shorter.
I = 100 mm, 2 pos unshielded wire, qty = 4
Use for input/output wiring for channels 1 and/or 2 when shielding is not necessary, or for LEDs which don't need noise shielding. Similar to G but shorter.
Modules:
Z.Vex Effects is presently introducing 3 modules so that you can easily build up famous Z.Vex circuits into your Inventobox. The first three will be the famous Super Hard-On, the Fuzz Factory, and a fully-buffered Tone Stack module that emulates the bass/mid/treble controls on a Marshall® amplifier. These modules plug into the experimenter's socket, eliminating the need to wire up most individual components. They're labeled with the connections you'll need to make to the pots. Adding a few jumpers to the board makes it easy to wire these circuits up in standard configuration, but if you want, you can adjust the values of different capacitors and resistors (and even the transistors on the Fuzz Factory) to suit your own tastes! Instructions for modifying the tone of your circuits are included with each module.
Assembling one module into the Inventobox can be done as quickly as 5 or 10 minutes! Changing the tone of the module to suit your personal tastes can be done in a matter of seconds. Using the stainless support rods, you can leave the lid floating above the enclosure and adjust the tone by quickly changing parts until you reach your ultimate sound!
The most amazing thing about modular construction for the Inventobox is that it's open-source! Anyone can design and build their own modules for the Inventobox. We hope to sell modules online by various designers which give you a really wide range of effect choices.
Sockets in the lower enclosure:
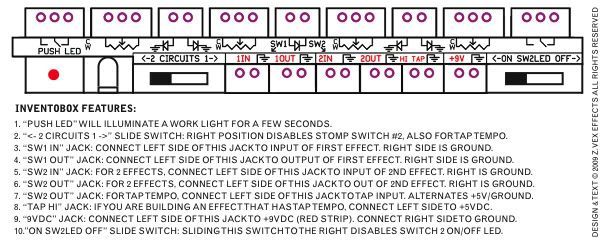
This sticker is found inside the upper enclosure, making it easy to know which sockets to use:
Here's a summary of the sockets and switches inside the window between the enclosures:
1] "Push LED" illuminates a pair of work LEDs inside the lower enclosure for a few seconds, allowing you to more easily see the connectors for plugging in your cables.
2] 2. “” is a slide switch which lets you disable the 2nd channel (if you are only building one circuit into your Inventobox) so you don't accidentally step on Channel 2 and have dead silence. This also allows you to use channel 2 as a tap-tempo switch instead of a true-bypass switch, if you are building a circuit that needs tap-tempo such as a tremolo or sequenced pedal. Slide to the right to disable Channel 2.
3] "SW1 IN" is the input jack for Channel 1. The left side is hot, the right side is ground. You'll always use this jack when you build a pedal into your Inventobox.
4] "SW1 OUT" is the output jack for Channel 1. Again, the left side is hot, the right side is ground.
5] "SW2 IN" is the input for Channel 2, if you're building two effects into the Inventobox.
6] "SW2 OUT" is the output for Channel 2.
7] When using Channel 2's stomp switch for tap tempo, connect this jack to the input of your tap tempo circuit, and bypass channel 2 using the circuit control switch (#2 above).
8] "TAP HI" jack is used to power up the tap tempo stomp switch. Connect +5VDC to the left lug and ground to the right lug for Z.Vex tap tempo effects.
9] "9VDC" jack is used to provide fused, filtered power to your circuit. If you exceed the Inventobox's maximum current rating by accidentally shorting the power to ground, the fuse LED will light on the lower enclosure and the 9VDC supply will be reduced to a safe voltage/current range. Disconnecting the 9VDC power and removing the short will cause the power to be restored.
10] "" switch allows you to turn off the Channel 2 stomp switch's on/off LED to reduce confusion about the function of that switch when it is not in use or when you are using it for tap tempo. Switch to the right to disable the LED.
Getting Started:
Remove the four thumbscrews from the upper enclosure's lid, set them somewhere safe, and lift out the lid. Inside you'll see the white experimenter's socket in the brass tray. Unscrew the two brass thumb nuts and set them aside securely. These are ordinary lamp parts that can be replaced easily at most hardware stores or any lamp repair shop. Lifting off the tray will reveal the top circuit board and removable potentiometers. Use the supplied mini screwdriver and socket wrench to remove the potentiometers and move the values you want to the positions you need each one to be in. For example, the Fuzz Factory and Super Hard-On modules can easily be built into the Inventobox if you put a C5k, B2K, B10K, B10K, B10K, and a C5K in order in the top row of the lid. Remember that the pots go in reverse order from the inside. Be sure to look at the construction as you progress to make sure you're not inverting the order. Don't over-tighten the nuts on the pots or you might strip the threads.
If you're going to use the Tone Stack module with the SHO or Fuzz Factory, simply install A1M, A20K, and A250K as the last three pots in the second row on the lid. This makes assembling the Tone Stack very easy.
Once the pots are in place and secured, re-attach the brass tray to the lid and use a proper-length jumper wire from the included kit to ground the black bus on the experimenter's socket to the tray. If you are using positive ground, connect ground to the red bus on the experimentrers'socket. In most cases, you'll need to jumper the center gap on the red bus across as well, unless you're using bipolar power.
Now plug in the modules so that the silkscreened images of the pots are properly oriented toward the proper pots. The SHO module goes on the far right, with the pot silkscreen aimed at its C5K pot. Use the proper-length wires to hook up the pot. Insert jumpers where needed. Connect power to +9VDC and ground pins. Connect type E cables to the input and output pins and grounds, and plug them into the proper Channel 2 input and output jacks in the window between the enclosures. You may now test the module by plugging in a guitar and trying channel 2. Make sure Channel 1's LED is off! The process is repeated with the Fuzz Factory module in the middle and the Tone Stack (if you wish) on the far left. Simply wire the Fuzz Factory's output directly to the Tone Stack's input and it's output to the OUT 1 jack using E-type cables. Be sure to select the lengths that most easily match the distance to the connections. The best way to do this is to set the lid inverted onto the stomp switches so that it locks securely in place. This makes it obvious what lengths to use, either 100mm or 150mm. The modules come with individual instructions as well as videos that show all details of assembly, as well as suggestions for modifying the tone of each module.
Rock on, and happy designing!
Zachary Vex
VENTE A PERTE PEDALES ET BAFFLE HAUT DE GAMME
"J'ai l'impression que certains ici ne prennent pas la guitare assez au sérieux... J'en ai surpris en train de s'amuser... Dommage..." - Zepot
FAUVE ? "imiter Thierry Roland qui imite Grand corps malade, c'est pas donné a tout le monde" - Mia Wallace


